Showing posts with label Diwali Special. Show all posts

Nov 7, 2011

Seven Cup Besan Burfi

Hello Everyone! Its been a while since I blogged. I've missed all the interactions with you but guess what - I'm  here now and hoping to show up on a regular basis as before. 

Hope you all had a fun and festive Diwali season and also Halloween if you're in the US. Have you eaten all of that candy already? 

What better way to start off from a hiatus with nothing but a wonderful sweet. This is a sweet that I did prepare for Diwali this year but could not get to posting it earlier. This is a really easy and basic recipe and I'm sure a lot of you are familiar with this. I've modified the quantities here just so I could make a lot of the burfi to share with friends for Diwali.


Here's the basic recipe.

I doubled the quantities to make a lot of burfis - so the pictures you see here are for double the quantity.

Besan - 1 cup
Sugar - 2 cup
Coconut - 1 cup
Milk - 1 cup
Ghee - 2 cup


Sieve the besan and dry roast it in a wide pan till the raw smell goes away.


Add the sugar to the besan and mix well.


Slowly add the milk and keep stirring so that no lumps are formed.


Mix well and keep stirring. Make sure the pan is in medium heat and not too low or too high. Have high heat would just burn the bottom and that won't make pretty or tasty burfis.

As you keep stirring, keep adding a few spoons of ghee at at time and mixing well so that the ghee incorporates well with the mix.


When the mixture starts to bubble and thicken up, add the grated coconut to the mix and stir well. Remember to keep adding that ghee a little at at time.


Can you see the whole mix starting to thicken up here?


And now, its pretty thick and almost ready to be taken off the heat. Make sure you have a well greased plate or a baking pan lined with parchment paper where you can transfer this hot mix into for it to set.


When the mix is thick and start to leaves the sides of the pan, switch off the heat and pour immediately to a well greased plate or a parchment lined baking pan as below. The mixture cools down pretty quick and starts to turn hard.


When the mix has cooled down a little bit, using a knife, gently cut across into the mix making little squares. And you're done!

All you have to do now is to pick a few pieces, eat it and make sure they all taste great! And I tell you from experience, yes, they do taste great!


Was that not an easy burfi to make? And don't they look pretty too?


So eat some, share some and don't worry if they are all done soon, you can just make them quick enough again!


Enjoy. Peace Out!

Oct 21, 2011

Diwali Recipes

Here's wishing all my readers a Very Happy and Exciting Diwali ahead. May the season bring upon a lot of joy to you and your loved ones.

My apologies for not being active on the blog all month long. I know its sounds cliche when I say that its just been really hectic. But that's the only reason I do have to say. Will come back in full foce once things settle a little bit.

Until then, here are some Diwali recipes from the archives.

Hope you all have plans to make a lot of exciting Diwali specialities over the weekend and next week. Enjoy the process and of course savor the results throughly!

Diwali Savory Recipes

White Murukku
Coconut Milk Murukku
South Indian Mixture
Thattai
Tukkada

Diwali Sweet Recipes

Mango Burfi
Chocolate Rolled Gulab Jamun
Paneer Basundi
Rasmalai
Sweet Somasi
Coconut, Chocolate and Nuts Burfi
Bhoondi Ladoo
Badusha
Mysore Pak
Jangiri

Enjoy! Peace Out and a very Happy Diwali to all of you!!

Apr 15, 2011

Sweet Somasi

Wishing all my Tamil and Kerala readers a Happy New Year and Vishu. May this year bring you all that you want and a little more. My new year celebration yesterday was very simple - actually I just made a whole big tray of Pongal and went to the temple here for the puja and aarti. So many people had bought so much food and it was a complete feast with chakkara pongal, ven pongal, kesari, puliyodharai and so many other delicacies.

On  my personal front, life has been crazy hectic for the past few weeks. I've taken up a new job and my schedule and routine is gone for a toss and everything is changing fast around me. But, I know I have to move quickly with all the change and get accustomed to my new routine and plan all my things so that at the end of it, its all harmonious. Well, that's my plan anyways. We'll see what happens.

This recipe has been sitting as a draft for a long time and I thought today would be a perfect day to post this. What day is not perfect actually to talk about Sweet Somasis. My forever memory of somasis are during Diwali season. My mom would never make these but my neighbors did every year and we always got our share to eat year after year. And this had become a sweet I would look forward to every Diwali. Even when I was almost suffocated with all the sugar, I would still pick these up and eat.

This was my version of the somasi filling - a coconut and nut based filling. This can also be made with many different fillings - people stuff them with a coconut and jaggery filling, a coconut-kalkand-nuts filling, a coconut -rava-sugar-nuts filling and many other varieties.


Let's get started with making the filling. Take about 2 cups of assorted nuts - I used Pistachios, almonds, cashews, pecans and walnuts. Add all the nuts to a food processor and pulse for a few times until you get a coarse powder of the nuts.


Like this. A few big pieces are fine too - as that will be the pieces you actually bite into.


Also, pulse about 1/2 cup of raisins or even chop them up fine and add to the powdered nuts. So, you can see here that I have a little more than 2 cups of all the nuts and raisins.


And for the coconut, I decided to use the sweetened coconut flakes. These work really good for the sweet stuffing and you don't have to add any extra sugar. If you are using regular coconut, just scrap the coconut into thin shreds and cook with sugar. For 1 cup of coconut, add about 1/2 cup of sugar. Add both together in a pan and cook for a few mins, the sugar will melt and carmelize the coconuts. Remove and them mix with the nuts.


Since I was already using the sweetened coconut, I added 1 pack of the coconut flakes to a pan. Set the heat on low-medium.


Add all the powdered nuts with the raisins in here and mix well with the coconut. The sugar in the coconut would slightly melt and bring together everything to a slightly sticky mass.


Now, there in a couple of mins, the stuffing is ready! Set aside and let this cool down.


Now for the outer cover, here is the ingredient list.

2 cups Maida
1 cup Rava
1/2 cup melted butter
Pinch of salt
Water - few drops as required

Add the maida, rava and salt to a electric mixing bowl or a regular mixing bowl. Using Kitchenaid for this if you have one, is the perfect way to go as the dough hook makes a soft and pliable dough very easily.


Add the melted butter to the flour mix.


Using a dough hook, process the dough adding water a little at at time. Add as little as required to make a tight dough but still making sure that all the flour is incorporated completely in the bowl.


You see the dough coming together. This dough will be very soft and pliable. If you are mixing with hand, just make sure you knead well for about 5-7 mins or until you get a soft, pliable dough.


Move the dough to a mixing bowl and let it sit for about 20 mins.


Then make small balls out of the dough - make sure they are all approximately equal sized.


Roll out each ball similar to a roti to make a thin cover.


Using something that is of a perfect round shape, I used just a regular dabba cover with sharp edges. Place on the rolled out layer and press to get a perfect round shaped cover.


Remove all excess dough from the sides.


And there, you have a perfect little round cover that is ready to be filled.


Take a small ball of filling - roll it up into a tight ball using greased hands.


Place the filling in the center of the cover.


Fold one half over the other to form a semi circle. Using a fork, press down and seal the edges.


You can use a pizza cutter to make sure that the edges are smooth and not jagged. Cut off a little excess and make sure that the entire semi circle has an even edge.


Now these are ready to be cooked. Traditionally these are deep fried in oil. Which even in the modern day, tastes the best! But, this time I fried half the batch and baked the other half. Because I was sharing with some friends who were off the deep fried stuff.


See how even the edges look because you used that pizza cutter? Just say yes, even if  you don't think so. Please.

If you are baking these, pre heat the oven to 375F and bake for about 15 mins or until the top turns golden. Brush all the somasis with warm oil before you move them to the oven.


Once they look done, brush again with a little oil or butter on top.


And this batch is done. Ready for you to grab one. Go ahead - no one is watching.


And these are the somasis that were deep fried. Trust me, I know its not as healthy as the baked ones - but these taste the best. Way better than the baked ones. The baked ones were good - but too crisp on the outside - these had that perfect crispy and chewy texture on the outside. So, if you can afford the deep fried indulgence, go ahead, say a prayer and just do it.

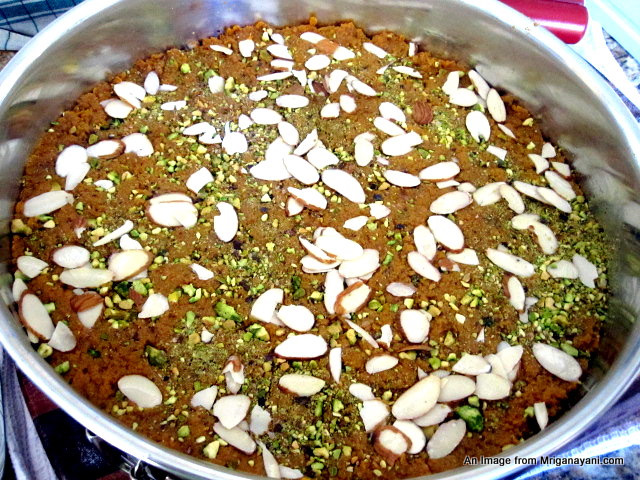
Sorry I don't have great pictures this time - which was why this was in the draft mode for a long time. But, hey, its a good recipe and I don't want the lack of great pretty pictures to stop me from sharing this with you.


Enjoy. Peace Out.

Nov 10, 2010

Diwali Special: Mango Burfi

If there was a fruit that I wish grew in my backyard every day of the year, it would be Mangoes. And there’s got to be at least a few ripe ones every day!

Such is my love for mangoes. And when its not mango season, my love shifts to the mango pulp available in cans all year through. Thank God for those companies that make them. I pray recession never strikes them!

So for this Diwali, I wanted a mango something in my sweets just because I had a can of mango pulp sitting in my pantry. And Mango Burfi was an instant thought. No questions asked – I got to work on it. Maybe I should have asked a question on how much patience was needed – the answer would have been “a lot”. And I mean it. A lot. You’ll see what I mean.


The recipe is pretty simple. Boil some milk till thick, add some sweetened condensed milk to it and cook till you get an almost khoya consistency. Add mango pulp to it and cook till it all comes together. Easy, right? Yeah. You bet.

But many easy things in theory are a little difficult in practice. Like your moral studies lesson #1 – Always speak the truth. Yeah Right. Don’t laugh – think of the last 3 times you had to lie to save yourself from disaster…see, I told you. Yeah Right.

But, I’m going to be honest now and tell you that this does take time to make. If you want a quick east instant Mango Burfi, I might bring that to you in the future but this is not it. This takes time – a lot of time. Because you have to keep stirring it in low flame until the whole thick cooks and all the water evaporates. But once it’s done and you take a bite of that small piece of mango burfi – all your efforts are so worth it.

So let’s see how I spent my few hours doing this.

Take a heavy bottomed pan. You could use good quality non-stick if you have. I don’t use non-stick for my cooking at all and kind of replaced all of my cookware with either heavy stainless steel or hard anodized pans.

Add whole milk – about ¾ of a gallon to the pan. Heat in medium high until the milk starts to boil and then reduce the heat to low. From that point, all of the cooking will be done in low heat and that is precisely why it takes time. Medium or high heat will just burn the milk at the bottom and you’ll have to keep scraping little red parts of milk – don’t want that in your burfi, do you?


When the milk is reduced to almost half of it volume, add one can of sweetened condensed milk to the pan. There is no need to add additional sugar as this is sweet enough and besides the mango pulp also is sweetened.  Keep cooking the same way – low heat and stirring every couple of mins.


While this is happening, on another pan, heat up the mango pulp in a low heat until its hot but not boiling.

Also, dry roast some chopped pistachios and sliced almonds and keep aside. This will top the burfi for a tasty bite and a pretty look.


You’ll see that all the milk almost turns into a thick khoya. At this point, add the hot mango pulp in here. And then add about 1-2 tbsp of light corn syrup. This helps is setting the burfi once its done.


Keep cooking until the whole mix thickens up and starts coming together. You don’t have to really stand there and keep watching the burfi while its cooking. I was making my somasis in parallel and hence did not feel that I was stuck to this. Those got done too by the time this was done!


Grease a cookie sheet or a plate with raised sides for cooling the burfi and letting it set. I used my spring foam round 11 inch cake pan. This way, once its done, you just remove the side and it becomes easier to cut it into small pieces.


When the burfi is almost done and you see a solid mass coming together, move it to your greased pan and smoothen the top. Spread it out so that you have at least an inch in height. Smoothen the top with a greased spoon.


Add the roasted nuts on top and gently press them down.


I let this sit on the counter until it completely cooled down and them moved it to the freezer for a couple of hours. Then, take it out and remove the spring foam pan. Using a pizza cutter, cut the burfi into small squares.


And then, just eat, share and eat more.


Who wants this stack?


This was my favorite piece - that's why it got its own photo shoot done!


Enjoy. Peace Out!